
使用CSS修改WordPress主題
本文介紹如何透過CSS修改WordPress主題:
 在主題自訂裏有的一個附加的CSS,可以讓我們加入CSS:
改變字型與字體格式:
在主題自訂裏有的一個附加的CSS,可以讓我們加入CSS:
改變字型與字體格式:
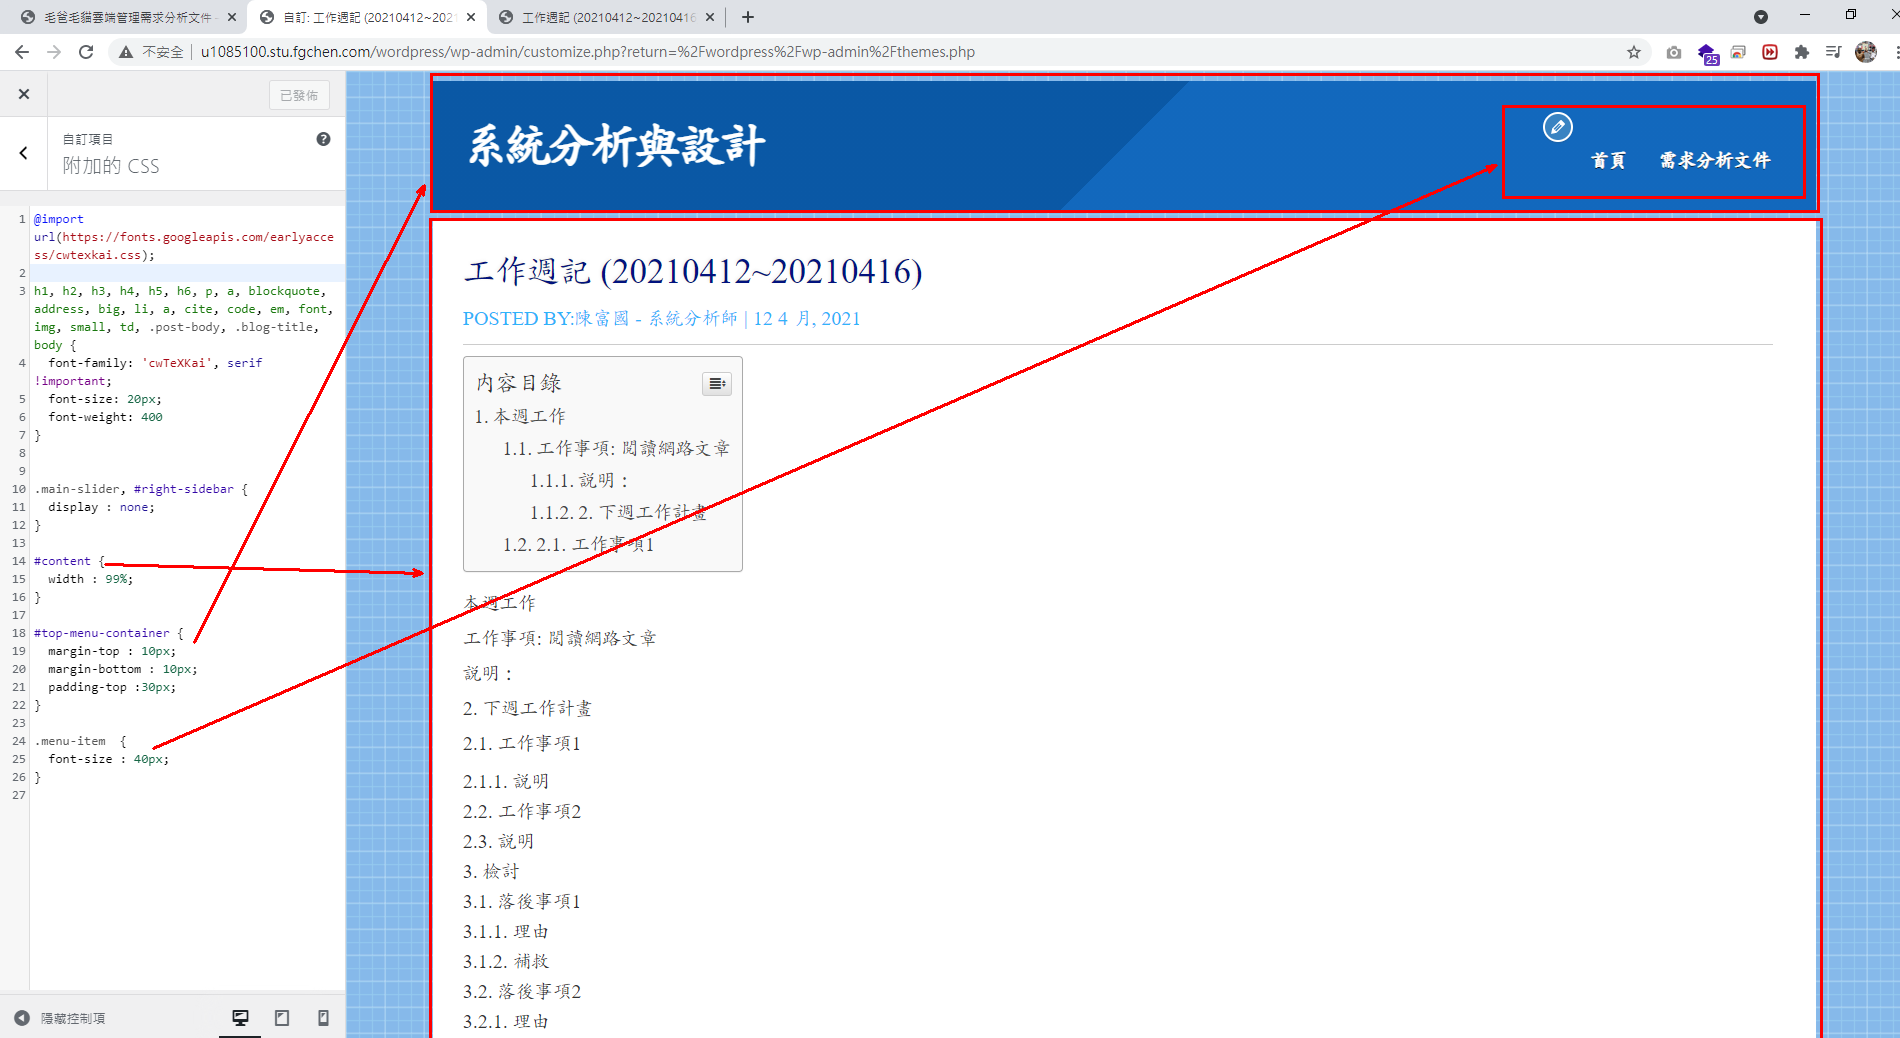
 我找到幾個要調整的區塊,透過 CSS 選擇器 (tag, id, class) 進行CSS格式設定:
- 字型、字體大小等
- 區塊設定(tag, ID #, class .)
在主題自訂裏有的一個附加的CSS,可以讓我們加入CSS:
改變字型與字體格式:
@import url(https://fonts.googleapis.com/earlyaccess/cwtexkai.css);

h1, h2, h3, h4, h5, h6, p, a, blockquote, address, big, li, a, cite, code, em, font, img, small, td, .post-body, .blog-title, body {
  font-family: 'cwTeXKai', serif !important;
  font-size: 20px;
  font-weight: 400
}
線上字體的使用可參考這篇文章:Google Fonts 線上字體推出 5 款免費的中文網頁字型
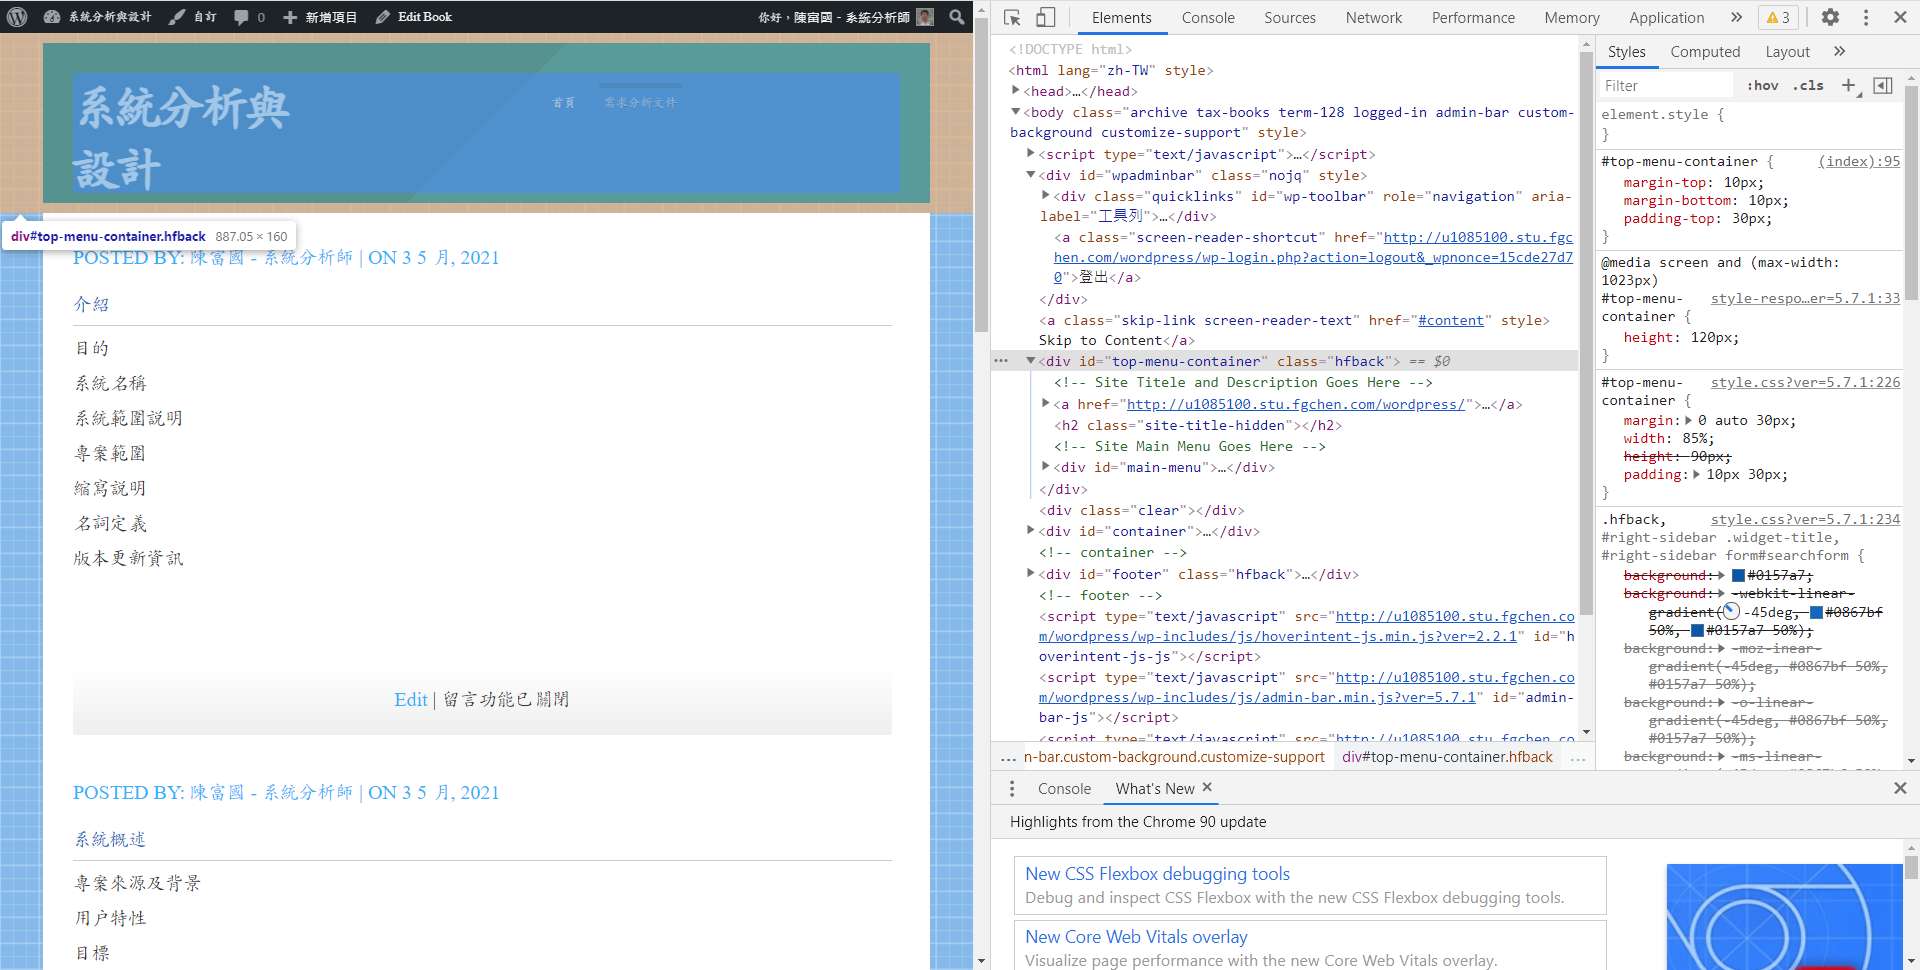
接下來,我們要去找出網頁的區塊名稱或類別,我們可以用Google Chrome的開發者模式來找網頁的結構:
我找到幾個要調整的區塊,透過 CSS 選擇器 (tag, id, class) 進行CSS格式設定:
.main-slider, #right-sidebar {
  display : none;
}

#content {
  width : 99%;
}

#top-menu-container {
  margin-top : 10px;
  margin-bottom : 10px;
  padding-top :30px;
}

.menu-item  {
  font-size : 40px;
}
")
